Leaping in PowerShell
· 2008-02-29 14:04 by Thijs Kroesbergen for Brokenwire.NET
Because today is a special day, Leon decided to use C# to calculate a leap year. Because I'm in the PowerShell mood, I'll use that to do exactly the same thing!
Are you ready? Here it is:
[DateTime]::IsLeapYear($year)
Can you see the connection between C# and PowerShell?

Publishing test results to TFS
· 2008-02-28 09:06 by Thijs Kroesbergen for Brokenwire.NET
When running (unit-)tests outside your build process it is still possible to publish the test results back to the build you're testing. For this you can use MsTest.exe or Visual Studio and you need the Team Explorer bits installed. Because we implemented a fully automated system-integration testing system we wanted to use the command line to start the tests and have the results published back to TFS.
So, straight from the MsTest /?:
The following options are also available if Team Explorer is installed:

  /publish:[server name]            Publish results to the Team Foundation
                                    Server.

  /publishbuild:[build name]        The build identifier to be used to publish
                                    test results.

  /publishresultsfile:[file name]   The name of the test results file to
                                    publish. If none is specified, use the
                                    file produced by the current test run.

  /teamproject:[team project name]  The name of the team project to which the
                                    build belongs. Specify this when publishing
                                    test results.

  /platform:[platform]              The platform of the build against which
                                    to publish test results.

  /flavor:[flavor]                  The flavor of the build against which
                                    to publish test results.
That's easy! Yes, but, hmm not so easy after all....
Here is the catch (which took me a lot of time to figure out): You need to specify the value for the platform parameter exactly the same as you have it defined in your build! Our build is configured with "Any CPU" but when passing "x86" seemed to work as well, except that the results would just disappear. This is what happened: when passing the wrong platform MsTest will publish your results to TFS, but you can not find them ever again! When you pass the correct parameters the results will be attached to the build tested (and they are visible in the build store) and results file (.trx) will be placed in the drop location for that build.
The 4 possibilities for platform are:
- Any CPU
- x86
- x64
- ia64
A full example of using the MsTest.exe command to kick the test and publish the results to TFS:
MSTest /nologo /testcontainer:"MyTests.dll" /runconfig:"localtestrun.testrunconfig"
/resultsfile:"MyTestResults.trx" /test:MyUnitTest
/publish:"http://TfsServer:8080" /publishbuild:"DailyTestBuild_20080227.1" /teamproject:"TestProject"
/platform:"Any CPU" /flavor:Debug
Now if MsTest (or the TFS webservice) would just have returned an error if you passed in the wrong platform, that would have been much better (and saved me a lot of time)...
Using the Team Foundation Object Model with PowerShell
· 2008-02-26 12:45 by Thijs Kroesbergen for Brokenwire.NET
After my first steps in PowerShell I wanted to do something more. I wanted to manipulate the TFS build store from within PowerShell (because I installed TFSDeployer which responds to "Build Quality Changed events" from TFS). So after some Google-ing I found the "get-tfs.ps1" script written by James Manning. His script wraps the Team Foundation Server SDK (which is .NET object model to access TFS) into one nice PowerShell script.
The only thing his script could not do, was manipulate the build store. But with the addition of one line I made this possible. His version also was a "script-as-function" while I'd rather have just a separate function that I could put in my script library. The script now look like this:
function get-tfs (
    [string] $serverName = $(Throw 'serverName is required')
)
{
    # load the required dll
    [void][System.Reflection.Assembly]::LoadWithPartialName("Microsoft.TeamFoundation.Client")

    $propertiesToAdd = (
        ('VCS', 'Microsoft.TeamFoundation.VersionControl.Client', 'Microsoft.TeamFoundation.VersionControl.Client.VersionControlServer'),
        ('WIT', 'Microsoft.TeamFoundation.WorkItemTracking.Client', 'Microsoft.TeamFoundation.WorkItemTracking.Client.WorkItemStore'),
        ('BS', 'Microsoft.TeamFoundation.Build.Common', 'Microsoft.TeamFoundation.Build.Proxy.BuildStore'),
        ('CSS', 'Microsoft.TeamFoundation', 'Microsoft.TeamFoundation.Server.ICommonStructureService'),
        ('GSS', 'Microsoft.TeamFoundation', 'Microsoft.TeamFoundation.Server.IGroupSecurityService')
    )

    # fetch the TFS instance, but add some useful properties to make life easier
    # Make sure to "promote" it to a psobject now to make later modification easier
    [psobject] $tfs = [Microsoft.TeamFoundation.Client.TeamFoundationServerFactory]::GetServer($serverName)
    foreach ($entry in $propertiesToAdd) {
        $scriptBlock = '
            [System.Reflection.Assembly]::LoadWithPartialName("{0}") > $null
            $this.GetService([{1}])
        ' -f $entry[1],$entry[2]
        $tfs | add-member scriptproperty $entry[0] $ExecutionContext.InvokeCommand.NewScriptBlock($scriptBlock)
    }
    return $tfs
}
The way this works is that the "propertiesToAdd" array is looped through, and the $tfs powershell object is extended with a new object with the names of the first array element. The actual objects are retrieved from the third array element and they are retrieved from the assemblies in the second array element.
This function is used to create a $tfs object, like this:
$tfs = get-tfs http://YourTfsServer:8080
Next, you can use one of the properties of the $tfs object to do cool stuff.
VCS gives you access to the version control server. For example, you can download a single file, without an active workspace mapping:
$tfs.VCS.DownloadFile("$/Test Project/ClassLibrary1/ClassLibrary1.sln", "C:\ClassLibrary1.sln")
Or you can map a temporary workspace to retrieve all files in a specific folder:
$workspace = $tfs.VCS.CreateWorkspace([System.Guid]::NewGuid().ToString(), $tfs.AuthenticatedUserName)
$workspace.Map("$/Test Project/Dev/Branch/SomeFolder", "C:\SomeFolder")
$workspace.Get()
$workspace.Delete()
WIT lets you use the work item store. For example, you can retrieve the uri, title and state of a workitem:
$tfs.WIT.GetWorkItem(1) | Format-List uri, title, state
BS is the wrapper for the build store. Let's do something more complex: retrieve the last successfully completed build and once this build is found, update the Build Quality.
$build = $tfs.BS.GetListOfBuilds("Test Project", "TestBuild") |
where {$_.Buildstatus -eq "Successfully Completed"} |
sort -property FinishTime -desc |
select -first 1

$tfs.BS.UpdateBuildQuality($build.BuildUri, "Ready for Initial Test")
CSS contains the ICommonStructureService interface. This interface gives you access to the more common properties of you TFS server. For example, retrieve all projects on your server (which is just a bit boring...):
$tfs.CSS.ListAllProjects()
The last one, GSS, gives access to the group security service interface. The next two lines of script will give you a list of all the groups (both windows and application groups) a specific account is a member of:
$groups = $tfs.gss.ReadIdentity('accountName', 'YourNTAccountName', 'direct').memberof
$groups | foreach-object -process { $tfs.GSS.ReadIdentity('sid', $_, 'none') } | fl type, displayname
I know I like working with TFS & PowerShell a lot, and I hope you do too. Enjoy!
First steps in Windows PowerShell
· 2008-02-24 16:30 by Thijs Kroesbergen for Brokenwire.NET
Last week I made my first moves with Windows PowerShell. I used PowerShell to write a deployment script for the project I'm currently working on. The script is started by TFSDeployer, a great tool to integrate (and automate) deployment with Team Foundation Server.
I started with downloading & installing PowerShell+, a cool wrapper around the regular PowerShell interface. It has many cool features like Intellisense-alike tab-expansion and a tool window where you can inspect all variables that are currently in scope. The best thing about it: It's free for non-commercial use.
Then I continued with the deployment script. I wanted to install some MSI's and the most straightforward solution seemed to use msiexe.exe. Then I did my first steps into the nice world of PowerShell. Below you can find several "bumps" I ran into.
Variables
The usage of variables is easy. Just prefix the variable name with a dollar sign.
Examples:
$noot = "pinda"
$sum = 1 + 2
$msifile = "C:\Temp\SuperApp.msi"
String Concatenation:
Easy, just use the + sign, BUT you shouldn't use concatenation on the same line where you execute the external tool. Instead it's better to prepare the entire parameter in a variable and just pass that along.
Example:
$installdir = "C:\install\"
$package = $installdir + "MyApp.msi"
msiexec /i $package
Running external commands in-process
When starting MsiExec from inside a script the default behaviour is to return control to the script immediately after the background installer service takes control. You can prevent this by piping the output of MsiExec to the out-null cmdlet.
Example:
msiexec /i $msifile | out-null
Visual Studio Command Prompt
After fighting with PowerShell for I while I decided that I wanted to replace my old "command prompt" addiction completely. And because of that I wanted the "VsVars32" aka "Visual Studio Command Prompt" environment variables inside my PowerShell session. Somebody else already figured out how to use vsvars32.bat inside PowerShell, so I used these pieces of code:
This first function executes the batch file and copies the environment variables to PowerShell
function Get-Batchfile ($file) {
    $cmd = "`"$file`" & set"
    cmd /c $cmd | Foreach-Object {
        $p, $v = $_.split('=')
        Set-Item -path env:$p -value $v
    }
}
The second function retrieves the location of the vsvars32.bat file
function VsVars32($version = "8.0")
{
    $key = "HKLM:SOFTWARE\Microsoft\VisualStudio\" + $version
    $VsKey = get-ItemProperty $key
    $VsInstallPath = [System.IO.Path]::GetDirectoryName($VsKey.InstallDir)
    $VsToolsDir = [System.IO.Path]::GetDirectoryName($VsInstallPath)
    $VsToolsDir = [System.IO.Path]::Combine($VsToolsDir, "Tools")
    $BatchFile = [System.IO.Path]::Combine($VsToolsDir, "vsvars32.bat")
    Get-Batchfile $BatchFile
    [System.Console]::Title = "Visual Studio " + $version + " Windows Powershell"
}
And now, by just running the VsVars function without parameters you have your good old Visual Studio Command prompt set up in PowerShell!
Including other scripts
As soon as I started playing with functions, I realized that I wanted to be able to include external scripts files. I was looking for a "using" (C# style) or "#include" (C++) or maybe even "<!--#include virtual="somefilename"-->" (Classic ASP).
In PowerShell this kind of behavior is called "dot sourcing" and that name says it all. The syntax you use:
. ./somefile.ps1
Easy isn't it? (That is, if you've figured it out once). Look here for a complete overview of the PowerShell syntax, take a look here and here for an overview of the built-in commands.
Discovering commands by understanding the default verbs
All powershell commands (called cmdlets) start with a verb, followed with a dash and noun. You can find a complete verb-list on MDSN but the most important ones I've encountered are:
- Get
- Set
- New
- Add
- Remove
- Start
- Stop
By trying a verb and pressing the "Tab" key for keyword expansion (with a nice dropdown in PowerShell+) it's easy to "discover" new commands.
Using .NET framework classes in PowerShell
Part of the Power in PowerShell is that you can use .NET framework classes directly in your scripts!
Examples:
$niceandround = [math]::round(45.987654321, 2)

$date = [DateTime]::ParseExact("20060908","yyyyMMdd", System.Globalization.CultureInfo]::InvariantCulture)
And because our managers like excel, I'll show you how to do excel too...
$a = New-Object -comobject Excel.Application

$a.Visible = $True

$b = $a.Workbooks.Add()
$c = $b.Worksheets.Item(1)

$c.Cells.Item(1,1) = "A value in cell A1."
$b.SaveAs("C:\SuperImportantReports\LotsOfProfit.xls")

$a.Quit()
Conclusion
That's all for now folks! I hope you'll get started with PowerShell soon if you haven't done so before. If you're new to all this then I promise you'll get excited after you've tried it yourself. Take a look at these 10 tips and you'll be on your way.
Ps. It's very probable that I made a mistake in one of the examples above, if you spot one please leave me a comment so I can fix it ;)...
Vista SP1 now available!
· 2008-02-14 21:45 by Thijs Kroesbergen for Brokenwire.NET
A few days ago we were all sad that we had to wait until march for Vista SP1 RTM . But now we can be happy. Because SP1 is HERE (take a look at the top-downloads list) !
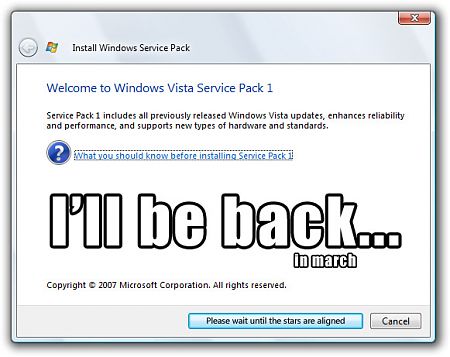
Windows Vista SP1 RTM
· 2008-02-04 20:25 by Thijs Kroesbergen for Brokenwire.NET
UPDATE: SP1 is out NOW
But it isn’t available for download yet…
The good news is that today the RTM (Release To Manufacturing) of the first servicepack for windows vista has been announced on the Windows Vista blog. The bad news is that it won’t be available via Windows update until mid-March. Automatic updates won’t even happen until mid-April. Also the currently available languages for the service pack are English, French, Spanish, German and Japanese.
I’ll keep an close eye on the MSDN subscriber site because I expect the SP1 to be available there a bit sooner…
Besides Vista SP1 it looks like Windows Server 2008 has also been made it to RTM, and this one is already available on the MSDN subscriber site! Nice :)